How to Make a 3D Model of the Skin?3 min read
This 3D model of skin is very simple to make and is very effective in helping younger children understand the layers of skin! You could always get some of these from around the house or even a store.
Contents
Know everything about skin before you start making a model of it
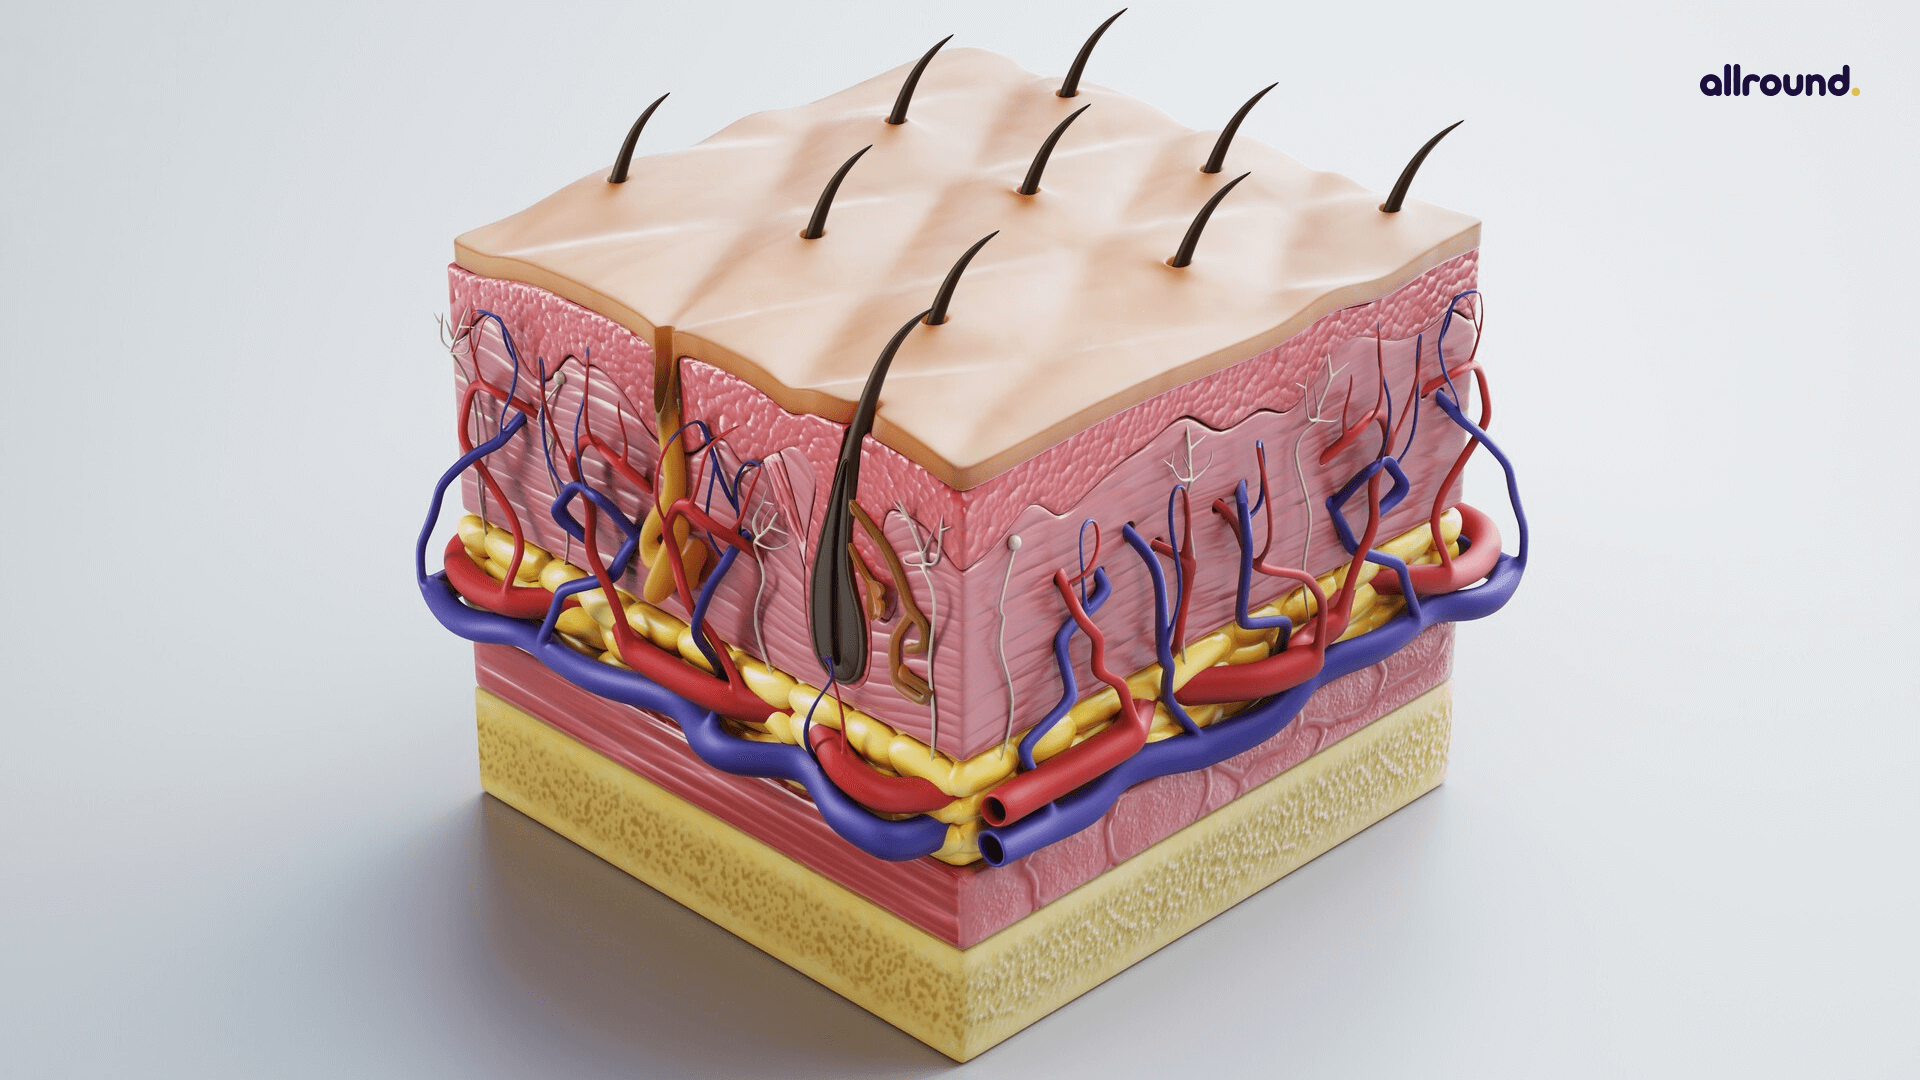
Our skin is the outer layer of our bodies that provides protection from various diseases and injuries. It also helps keep our bodies warm. Some animals have special features that protect their skin. For instance, birds have feathers on their bodies.
The third layer is the epidermis. Its thin outer layer is maintained by dead cells. The middle layer of the skin is called the dermis. It has thick and flexible fibers that make the skin look great. It also has blood vessels and nerves.
The fat in the third layer of the body is the third and deepest layer. It provides the body with nutrients and helps keep the body warm. The body releases substances through its sweat glands. These glands carry a liquid called sweat. It cools the body and helps keep the skin flexible.
Materials needed
- Thick sponges or foam cut into a square
- Pipe cleaners
- Rubber bands
- Raffia
- Toothpicks
- Paper lunch bag or grocery bag
- Labels – pre-made and cut
- Hot glue gun
- Scissors
Let’s start making a model of the skin
Step 1: You will need to make sure that the sponge is at least 2′′ high. If you buy thick ones, then cut them in half.
Step 2: Cut a single layer of paper that matches the size of your foam or sponge. You will then glue it down with the center and corner edges.
Step 3: For each section, cut the pipe cleaners into 1′′ sections. Stick them to a piece of foam or paper bag, or use a sponge or foam to cover the pipe cleaners. Stick the pipe cleaners sporadically through the paper bag side of a sponge or foam.
Step 4: Roll the cleaner around and attach it to the cross-section. Roll it around to represent sweat glands. Hot glue it to the other side of the pipe cleaner.
Step 5: Take a couple of spoons and twist them together so that they look like an intertwined vine. For the blood vessels, first, twist them together so they resemble an intertwined vine. Then, hot glue them to the sponge.
Step 6: Take a piece of raffia and carefully split it into three sections. Hot glue one end to the other.
Step 7: Take a 1/2′′ rubber band and draw a black dot on one end. Then, with a couple of scissors, split the end into two.
Step 8: For a tighter bag, make additional holes in the paper bag to expose the various features of the skin. These holes will help keep the bag secure.
Step 9: Hot glue the labels to the toothpicks. These will be placed in the cross-section of the project.
Conclusion
Skin is a vital part of the human body. It is fun learning about skin. Making the 3D model makes learning about it easier and helps your child comprehend it better.